Back to Learn

Setting Up a Map

Transform your app with a powerful, interactive map. Grandstand offers three types of maps:

Native Map

Use the native maps on Google and Apple and drop pins over the top. This is the easiest way to get started. With many of our plans you can even have multiple maps, including both native maps and graphical maps.

Graphical Map

Create a map using a map you have already created or will be creating. If you select this option you will still be able to drop pins over the top but you should start with a graphic that will be the same basic size as the final map.

Hybrid Map

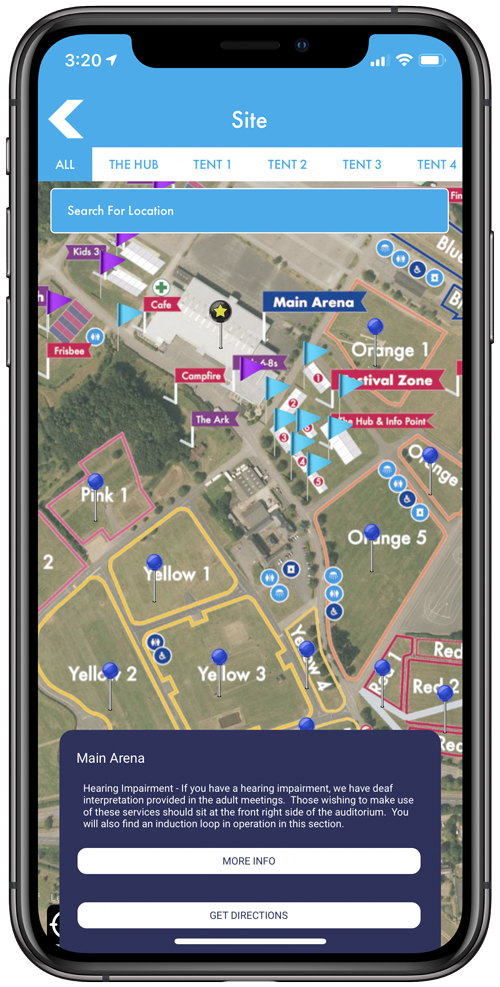
The hybrid map gives you the best of both worlds by layering your own graphical map on top of Apple/Google Maps allowing your users to see themselves move about your custom map. Not available in all packages or during the free trial period.

Step 1: Decide on Map Style
  • Choose one of the 3 styles of maps from above. If you are using a Native or Graphical map you can continue on. If you are using a Hybrid map please send your custom map to your Grandstand representative for initial setup before completing any of the next steps.
Step 2: Choose From Uploaded Map or System Map
  • If you are using the native Apple/Google map you can skip this step and go to Step 3.
  • If you are uploading your own graphical map go to Maps -> Graphical Map Uploads and select Add Image Map.
  • Uploaded maps should be smaller than 3000 pixels max in either direction. More importantly the resolution should be set to 72 dpi making the total file size less than 1 MB. Since the graphic is pulled from the server it is important to respect the file size.
Step 3: Decide on Map Tags Maps -> Map Tags
  • Map Tags (or Map Filters) allow the user to isolate groups of pins on your maps. Default Map Tags are made available to all apps but additional ones can be added via this page.
  • Map Tags should be general purpose groups such as Stages, Food, etc.
  • Specific map pin colors or graphics are assigned to map tags via this page as well.
Step 4: Setup Additional Map Basics Maps -> Map Setup
  • A default map is automatically set up in each account with your coordinates entered on the dashboard, but you may need to tweak that map to get started or setup a new one altogether.
  • Give your map a name (shows at the top of the map in the app)
  • Mark the type as “Custom Uploaded Graphical Map, Native Map Showing Roads (most popular), or Native Map Showing Satellite (least popular).
  • Showing the search box gives your users an easier way to find exact locations.
  • All Maps Button: A link to multiple maps can be provided at the top of any maps that turn on this feature.
  • Filter Display Types: This will add a filtering tool to the map (either horizontal scroll (default) or full-page vertical)

Step 5: Add Individual Pin Locations Maps -> Add/Edit Locations

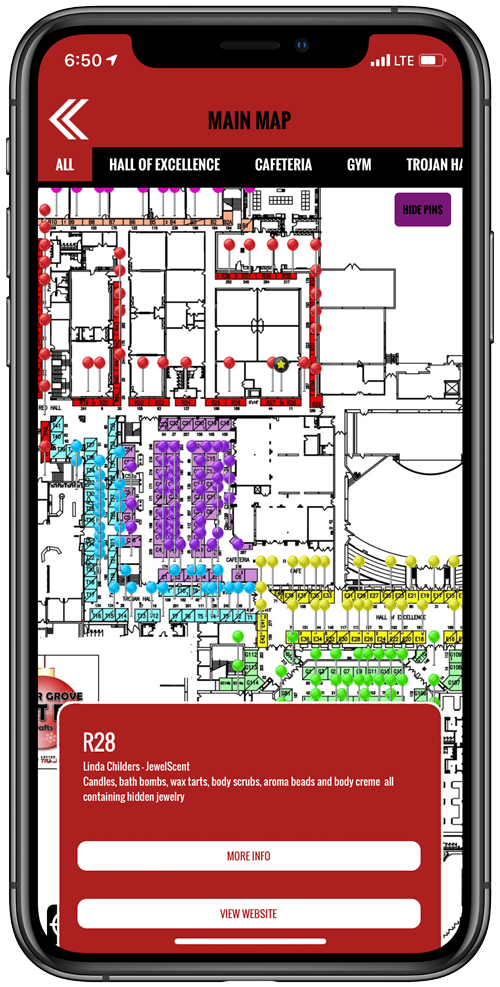
Having individual pins attached to your maps is what makes our platform so powerful and makes the in-app maps tool popular for users. Hit ‘Add Location’ to get started.

  • Location Title: Name that shows up on the map pin and in map search.
  • Map To Show On: Define which maps this pin should show up on. If you choose a map associated with a graphical map you will see that graphical map appear allowing you to click and add a pin. If you choose a native map you will see Google Maps appear with the ability to add a pin three different ways (Latitude/Longitude, Address Conversion, or Dropping a Pin). Depending on your package you can add a pin to more than one map at the same time. Also, some packages are eligible to have a custom map overlay over Google Maps. If setup you will see the overlay in Grandstand Admin as well and be able to add pin on top of your graphic.
  • Tag: Set the applicable tag filter to your pin (example: Food, Restroom, etc.). This is required and at this time you can only select one.
  • Description, URL, Associated List Item: All of these are optional, but Description and URL will be overrode if an Associated List Item is selected (not available in all packages). In addition, if you have already linked a Location to a List item during List setup you will see this location already linked to a list item. Changing the link in either place will change it in both places.
Step 6: Update to the App

When you are ready to go or just want to test out your progress hit the ‘Update Locations in App’ button in the top right of most Map pages.

Maps

Tutorials & Tips for
Maps

Other Tutorials & Tips